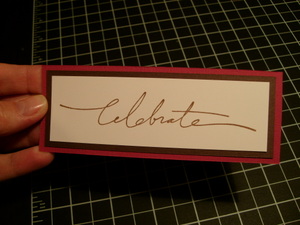
I can’t tell you how many times I have created a precise mat on three sides. Unfortunately, the fourth side fails to cooperate. Since I continuously aim for cards that don’t look like something from my daughter’s “special box” from the first grade, I purchased Stampin’ Up!’s Perfects Layers as a quick and easy way to create accurate mats. I’m now a devotee and will never go back to the frustration of shaving off that tiny little
extra piece on just one side followed by the need to shave off a teensy bit more
on another side to get it re-balanced–and often the whole mess landing
in the trashcan.
Perfect Layers Defined
- Two clear molded rulers with embedded stainless steel edge strips.
- 8 different mat measurements. 1/16, 1/8, 3/16, 1/4, 5/16, 3/8, 1/2 and 5/8″.
- Grooves to hold the top mat in place for each coordinating width.
- Works great with Stampin’ Up! self-healing cutting mat and hobby blade.
- Beautiful for matting photos, too.

To get started, cut your first layer to any dimensions you want and stamp your image.
Adhere your first layer to a second piece of cardstock. It does not need to be straight or centered. 
I purposely positioned my mat off center so you can see how Perfect Layers ultimately cleans things up.
Choose the mat width you desire (I used 1/8″) and find that width marked on one of your two Perfect Layers rulers. Important: Your width mark must be face up when you cut . 
Don’t worry if the Stampin’ Up! logo is face down. It often will be depending on the width you’re using, since there are widths marked on both sides of each ruler. Line the ruler up with the top mat, so that it fits into the groove. I recommend you wait to add any embellishments (brads, dimensionals, even paper piercing) so that the ruler and mats can remain flat and the top layer will fit snugly in the groove.
I learned this the hard way.
Hold the ruler in place and using your hobby knife and cutting mat, trim the excess.
Do this on the three remaining sides.
You can adhere a 3rd mat and repeat the process.
After finishing my 3rd mat (and for the purposes of this demonstration),

I decided to change the mat size to 1/16″ on my bottom mat.
It was easy to quickly and accurately re-trim on all four sides.
Try doing that with a paper cutter!

Here’s what I used to create this project:

Stamps: Brocade Basics
Paper: Whisper White, Chocolate Chip, Purely Pomegranate Textured
Ink: Basic Brown, Purely Pomegranate, Versamark

Tools: Perfect Layers, Cutter Kit (distressing edges), Stamp-a-ma-jig, Ticket Corner Punch, Heat Tool
Perfect Touches: White Embossing Powder, Rhinestones (non SU), Stampin’ Dimensionals


I thought I was the only one with crooked edges no matter how many times I tried to clean it, thought it was me. Great tip we could all use. : )